
As you move around the internet you may be being tracked by many third party companies and advertisers keen to analyse and profit from your browsing habits.
If you are concerned by all this third party tracking you can now activate Do Not Track on your web browser.
Do Not Track flags a user’s opt-out preference with an HTTP header and companies that receive the signal should respond accordingly and not track you.
It’s important to note that although the number of third parties who have committed to honour Do Not Track is growing, many still do not.
So, whilst we recommend you do turn on Do Not Track you should also take a look at the Browser Add-ons we recommend for additional privacy and security. (Privacy Badger, in particular, specifically focuses on third party tracking scripts that do not respect Do Not Track headers.)
Set Do Not Track Requests with Firefox
1. Click the menu button ![]() and then options.
and then options.
2. Go to the Privacy Tab
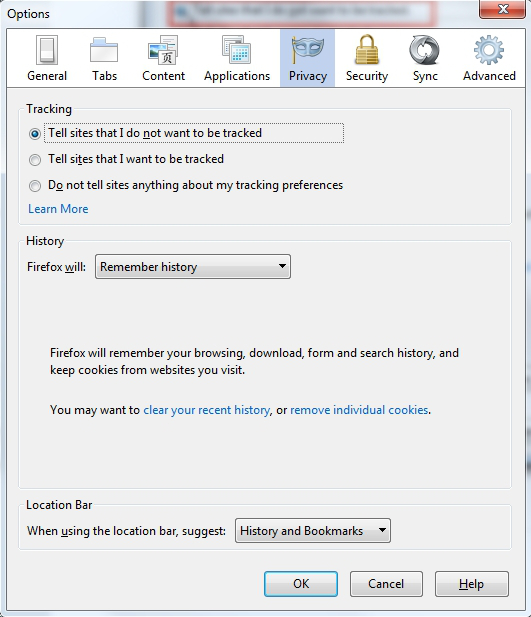
3. Select Tell sites that I do not want to be tracked
Set Do Not Track Requests with Chrome
1. Click the menu button ![]() and then settings.
and then settings.
2. Scroll down and click on Show advanced settings…
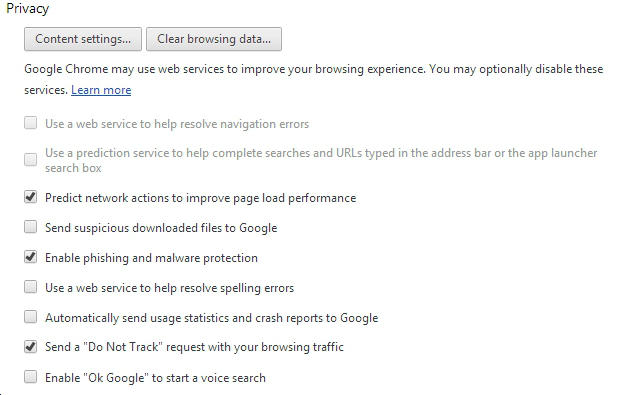
3. Under Privacy tick Send a “Do Not Track” request with your browsing traffic. Then click OK.
Set Do Not Track Requests with Internet Explorer
1. From the Safety menu select Turn on Do Not Track requests.
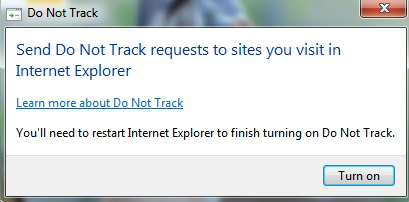
2. Click on Turn on and restart the browser.